On the fourth day of CADD Care, my CADD Team gave to me…Helpful tips on how to manage your markups and tools with the Bluebeam Tool Chest.
Bluebeam Revu contains a wonderful array of features and tools to help users be more productive and efficient when marking up and coordinating their PDFs. One of my favorite features is the Tool Chest. Within Bluebeam Revu, you can customize any markup and standardize it for use either by yourself or within your organization. When a custom markup is created and you wish to save it for later use, you can create a Tool Set that can be easily managed, manipulated, and pulled from the Tool Chest.
The Tool Chest within Bluebeam Revu is a panel that contains Tool Sets. Each Tool Set can be thought of as a separate markup library that contains markups that you have saved. These saved markups can be used in any PDF you review within Bluebeam Revu and will be applied using the same properties and characteristics from when it was saved.
To open the Tool Chest, simply go to your panels on the left side and look for the icon that looks like a toolbox. This is the Tool Chest. Bluebeam Revu comes with default Tool Sets already loaded for your use. Each Tool Set is labeled with a title: "My Tools," "Recent Tools," "Architect Review," etc.
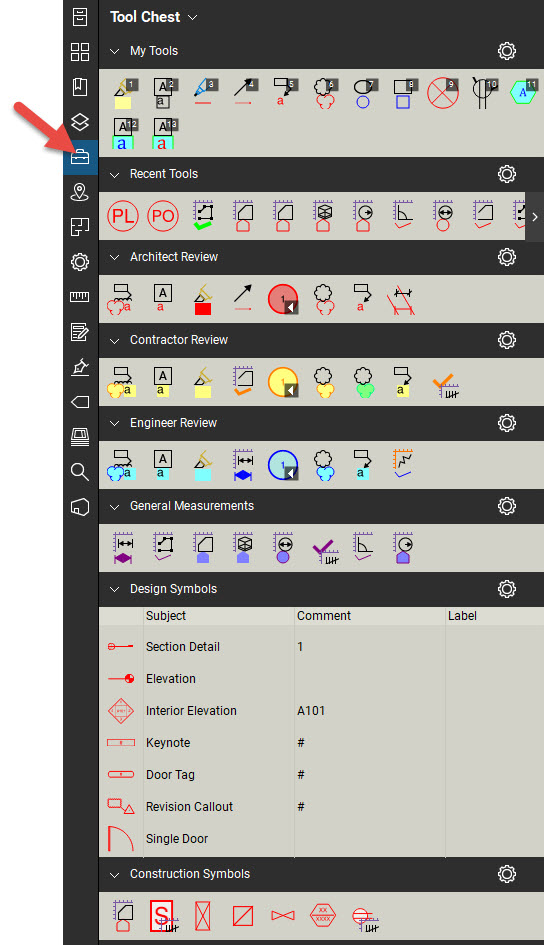
These default Tool Sets are a great way to get started in creating and customizing your own Tool Sets. Also, these Tool Sets can be loaded per Profile. Meaning, if you want to perform your own markups as an engineer, you may want to 1. Create a Profile called "Engineer" and 2. Load the Engineer Review Tool Set for that profile. We won't get too technical here, this is just something to think about.
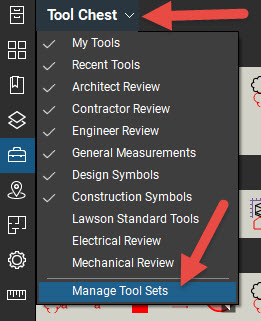
You can add your own Tool Sets by going to the Tool Chest dropdown located at the top of the panel and going to "Manage Tool Sets."
Once there, you can simply click "Add..."
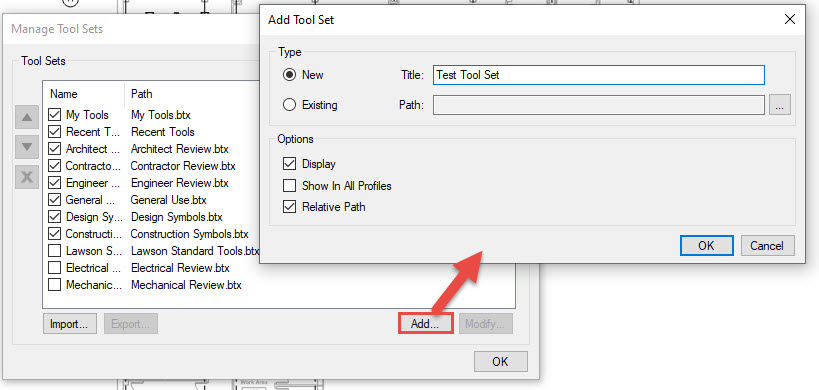
Here, you can set the title of the new Tool Set and choose where it will be saved. By default, the program will take you to the location where all of the default Tool Sets are saved for Bluebeam Revu. You can choose to save it there OR you can save it to a location where others can get to it.
If you do save it to a common location, such as a server directory, where others can get to it then they can load the same Tool Set for their use as well. Instead of going to "New" as displayed above, they would go to "Existing" and search for the new Tool Set. This is a great way to ensure that everyone is using the same Tool Set for their Markups.
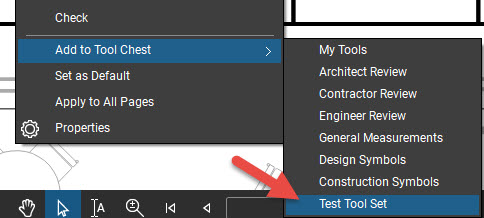
Assuming you just created a brand new Tool Set, the Tool Set will appear in your Tool Chest and contain no Markups. This is where things get a bit fun. You can add ANY markup you have made to ANY PDF simply by right+clicking on the Markup and going to "Add to Tool Chest."
Once added, you will see a preview of the Markup within the Tool Set you added it to. You will notice that if the Markup is a drawn markup such as a Text Box, Rectangle, Cloud, Cloud+, and others, the preview will show you almost exactly what the original markup looked like prior to you adding it to the Tool Chest. This can be toggled between what is called Drawing Mode and Properties Mode. When you add a drawn Markup, it will be added in its default mode, Drawing Mode. In the image below, I show what the same markup looks like in Drawing Mode (Left) and Properties Mode (Right). To toggle a Markup between these modes, right+click on the image in the Tool Set and select "Properties Mode" or "Drawing Mode."
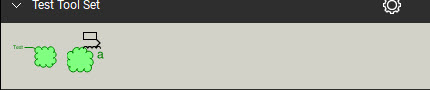
Drawing Mode (Left Icon) when used will add a new Markup to your PDF as an exact duplicate of the original.
Properties Mode (Right Icon) when used will add a new Markup to your PDF with the same PROPERTIES as the original but will allow you to change the text size, shape of the extents, and so on.
Note: Not every Markup has a Properties Mode and Drawing Mode. Markups such as Stamps and Snapshots do not.
When a Markup is made to a plan, it's properties and how it was drawn can be saved to the Tool Sets in your Tool Chest. This also means any extended properties/custom columns you may have added to your drawing. The Markup you add to your Tool Set is, essentially, a snap-shot-in-time. Meaning, all of its properties are saved at that moment and you can add the markup to any PDF of your choosing, and those properties get added to it. This gets a bit technical but what if you can apply a Markup that comes in with the correct color and shape but also applies other custom properties you've defined already? This can save an immense amount of time and effort and helps streamline the review process for you and your organization. CADD Microsystems has extensive knowledge and experience setting up standards for companies with this exact scenario in mind.
The Tool Chest, in a lot of ways, can help you and your organization standardize and streamline the markup and review process. Tool Sets can be saved individually or saved and shared with other members to ensure quality control and standardization. For more information, please reach out to CADD Microsystems here and we can set up a call with you and your team to discuss the best ways to utilize this unique and useful feature of Bluebeam Revu.
View previous posts in the Twelve Days of CADD Care blog series:
(Day One): Revit Tips (Day Two): Named User Management (Day Three): AutoCAD TricksCheck back next week to see what the CADD team has in store for all Twelve Days of CADD Care.
“Bluebeam®, Revu® and Studio® are registered trademarks of Bluebeam, Inc., used under license.”